The Sun's Path - Activity 2
Guiding Question: How far does the sun move between the time your bus arrives at school, and the time you eat your lunch?
Objective: Students will be able to describe/draw the apparent path of the sun in our St. Paul sky.
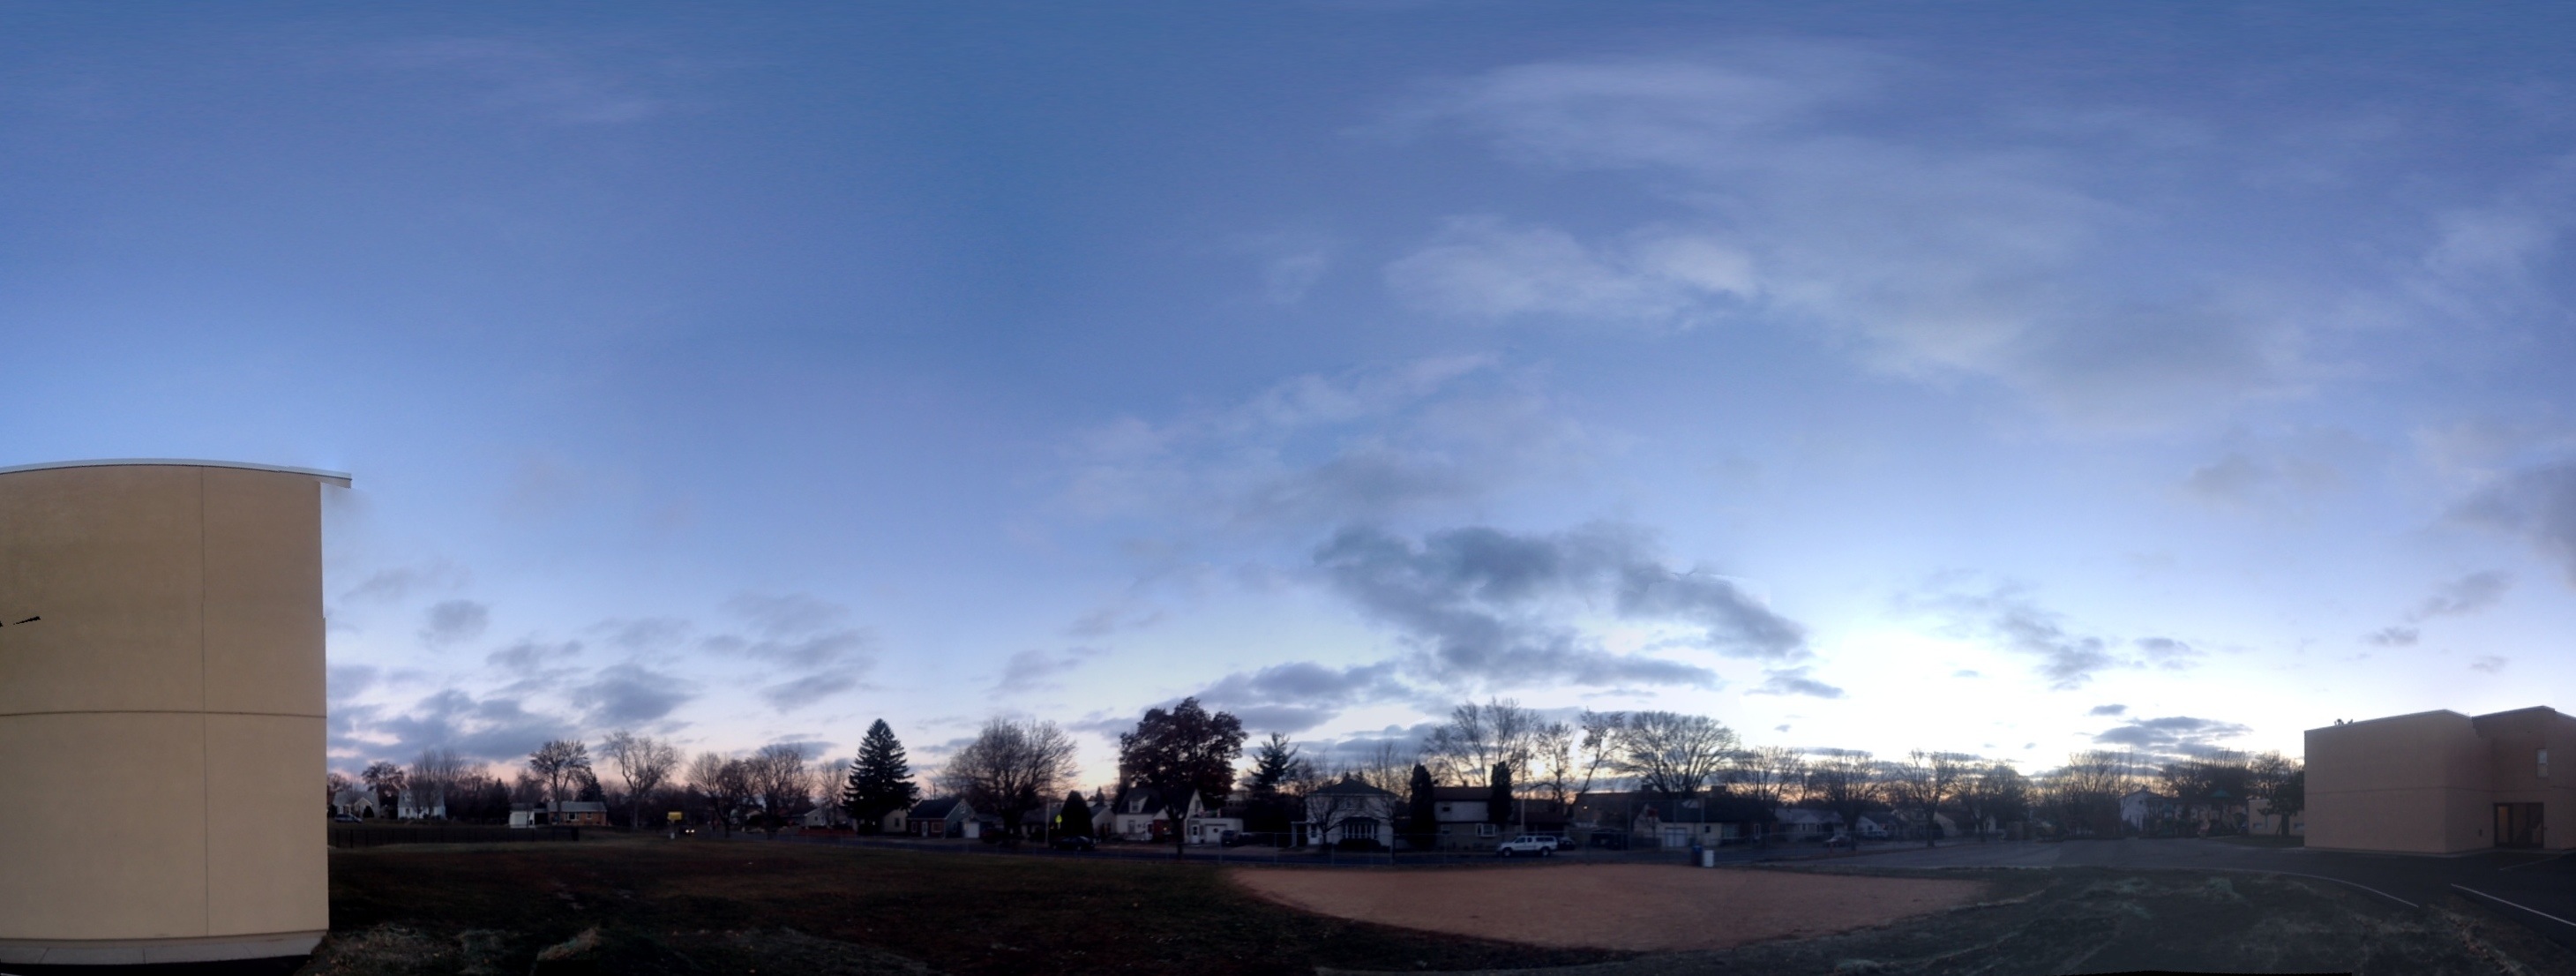
Materials: 3' X 7' Panorama Photo, (two) 8.5" X 11" copies of panorama photo for each student, 3 small yellow disks per student, Yellow Post-its, one pencil per student
Vocabulary: Horizon, North, South, East, West,
Safety : Remind students that they should NEVER look directly into the sun.
Technology Integration: Create your own timelapse of the path of the sun?
Preparation: Find a southward facing location in your school yard that you will be able to visit with your students. Take a panorama photo of this location. To create a panorama photo, you will want to take several images with your camera (smartphone), and stitch them together. This can pretty easily be done with an iphone and an iphone app. Photosynth is a free and easy to use iphone app that works great for this purpose. Once you have the panorama photo, you can simply print copies for the students. For a large classroom image, you can present the photo on your smartboard, or have a large 3' X 7' copy made. All State Banners can create a full color 3' X 7' image for $49.00. If necessary, you can simply make panorama sketches of the area (one small sketch to copy for the students, and one large sketch on butcher paper for the class).
Activity - Prior Knowledge:
- Show the students the Belwin Tree Shadow video
- Ask the students to describe what they see in the video in their science notebook
- Ask the students to describe what they think is happening in the video in their science notebook
- Have the students share what they have written in their science notebook with a partner
Activity - New Knowledge:
- Tell the students that they are going to gather some information and make some observations that will help them understand what is happening in the videos
- Distribute a small panorama photo of the schoolyard to each student
- Ask the students if they recognize where they photo was taken
- Ask the students to identify familiar landmarks in the photo
- Instruct the students to place the panorama photos on their desktop
- Introduce the sun “disks” to the students
- Instruct the students to place the “sun” where they think the sun was today when the arrived at school (walk around room to observe placement)
- Instruct the students to place another “sun” where they think the sun is right now (walk around room to observe placement)
- Instruct the students to place another “sun” where they think the sun will be today when they get on the bus to go home (walk around room to observe placement)
- Have the students share/discuss their “sun” placement with a neighbor
- Ask the students, “What could we do to answer these questions, so that we did not have to guess?” "What observations could we make?"
- Introduce large panorama photo of the schoolyard
- Ask the students to identify the following on the panorama picture: horizon, east, west, south, three landmarks (The photograph was taken facing south, east is to the left, and west is to the right. The horizon is where the sky meets the land. The three landmarks are yours to choose) As a clue, ask, “Did anyone see where the sun was this morning when you arrived at school?” “In what direction does the sun rise?”
- Tell the students that we are going to have a little friendly competition...to see who can best predict where the sun is right now.
- Have the students form groups of four.
- Tell each group to discuss where they think the sun is right now.
- Give each group a yellow post-it, and instruct them to place all four names of the group members on the post-it
- Have each group place the post-it where they believe the sun is right now.
- Tell students they will be going outside to check on the position of the sun.
- Teach students how to use their fists to count up from the horizon. Starting at the horizon below the sun, placing one fist on top of the other until you reach the sun, counting as you go up.
- IMPORTANT: Stress to your students never to look directly at the Sun. It can cause permanent eye damage.
- Bring the students outside to the location from which the photograph was taken. Make sure each student has the small panorama photo, and a pencil, with them.
- Without looking at the Sun, have the students identify the landmark on the horizon that the sun is above
- Have students use their fists to count up from the horizon. Starting at the horizon below the sun, place one fist on top of another until they reach the sun, counting as they go up.
- Have each student mark the position of the sun on their photo (because the photo is smaller, instruct the students to use the width of their index finger to represent the distance of one fist).
- Label the sun with a small circle and note the time above it.
Wrap-Up:
- Determine which group was closest with their prediction. Say "Nice job!"
- Now ask the students, “Where will the Sun be in an hour? Why?”
- Tell the students that they will explore that question tomorrow.
Lesson 2 - 50 Minutes
Activity - Prior Knowledge:
- Ask the students to share what they learned yesterday about the position of the sun in the sky.
- Review the location of the sun in the sky on the large panorama photo
- Ask students again, “Where will the Sun be in an hour? Why?”
- Place a post-it sun in the a predicted position (based on the input of the majority of the students)
Activity - New Knowledge:
- Tell the students that they will be going outside again with a new panorama photo and a pencil, marking the position of the sun, and bringing that information back to the classroom.
- Tell the students that each class period, other students will be doing the same thing.
- Bring the students outside, and once again, without looking at the Sun, have the students identify the landmark on the horizon that the sun is above
- Remind students how to use their fists to count up from the horizon. Starting at the horizon below the sun, placing one fist on top of the other until you reach the sun, counting as you go up.
- Have students mark the position of the sun on their panorama, and label the time.
- Bring these panorama photos back to the classroom, and have the students, through consensus, determine where to place a post-it "sun" on the large panorama. Now, have the students predict by drawing suns on their panorama, where the sun will be in one hour, two hours, three hours, four hours, five hours, ten hours.
- Each hour for the rest of the school day, students mark the location of the sun on the large panorama.
- At the end of the day or the beginning of the next day, review the large panorama photo and the position of the post-it "Suns."
- Have the students compare the position of the large panorama "Suns" to their predictions on their small panorama photos.
Assessment: Have each student draw a picture of what he/she learned about the path of the sun in their science notebook.
Extension: Show the students the video below. Ask the students to identify how the apparent movement of the stars in the video below, relates to the path of the sun.
